Starting with Vogue 8190 and using the lining pieces for the top of the dress and view B's 'skirt', I added length to the back for a train and tapered the sides to maintain the original front length. The back was re-cut to include a V that ended about 1 inch above the natural waist. The original pattern had darts in the bodice cup pieces. To ensure a close fit with no gaping, I changed the darts to princess seams. This gave a beautiful, close fit.
The body of the dress was underlined with silk organza and an invisible zipper was inserted at the center back. The silk shantung dress was lined with china silk , both from Mood Fabrics. A spiral steel boned, cotton foundation piece was inserted on top of the lining. I built padded cups into this so no bra has to be worn. A lavender zipper serves as a closure for the foundation. Grosgrain ribbon was used as the waist stay.
I removed some of the fullness of the front skirt to create less cones. This is a softer look and works beautifully with the silk shantung. This is absolutely gorgeous fabric...subtle sheen, sews and presses nicely. I decided not to underline the skirt to keep the soft drape of the fabric. The skirt was lined with china silk except the center back piece of the train. I knew this would drag for the outside photo session and felt the china silk might be too fragile. I chose a Bemburg rayon lining to add a bit more durability here.

Once the silk under dress was constructed and lined, I began the process of hand tacking the Alencon lace. First the overlay for the flounce was sewn. At the seam where the skirt attached to the bottom of the dress, I used a bias strip to cover the raw edges of the lace. To cover this strip, I trimmed the scalloped edge from the Alencon fabric and used this as edging.
Then I began sewing the lace to the body of the dress. The lace needed to fit the contours of my daughters body and I wanted a virtually seamless look. I began at the center back, creating a symmetrical application of the lace motifs. Hours and hours of hand-sewing followed until the lace application was complete.


Double scalloped, French Alencon eyelash trim from Vogue Fabrics was cut apart and was hand-stitched around the top of the bodice. The 9 1/3 yard hemline was also trimmed with this scalloped lace. The lace around the hemline was machine sewn with a narrow zigzag and lingerie thread.
1 inch horsehair braid was applied to the dress hem. The lining was stitched to the shantung to completely close the bottom of the dress.
To construct the tulle overdress, I started with Vogue pattern 2881. I pinned the 2-piece front together to give a single pattern piece and raised both the front and back necklines. We wanted the tulle to angle from the shoulder to opposite armpit, extending above the top of the bodice. I added extensions at the left side seams to allow for a button and elastic loop closure. Silk organza was used to interface this placket. The elastic loops on the tape were about 1-inch apart. I cut 2 lengths and stitched them together to get loops every 1/2-inch. Pearl buttons were then sewn to finish this closure.


12 double godets were inserted around the bottom of the tulle overdress. These godets started mid-thigh at the side seams and angled down in both the front and back. Each outer godet was cut to be twice the arc length of the inner godet. The godets on the sides were tapered to follow the lines of the train. Beginning at the sides, the godets were also cut about 12 inches longer than the length of the underdress to create a slightly longer train.
I slit the tulle, and inserted the godets, reinforcing the point with a small square of silk organza. I used a narrow zigzag stitch to keep the seams from puckering and to allow for a slight stretch.

Once the basic overdress was finished, I added small motifs cut from the all-over Alencon lace fabric. These motifs were randomly placed on each smaller inner godet. These were attached with lingerie thread and a narrow zigzag.

Larger motifs were cut and embellished with ruched seam binding. I folded rayon Hug-Snug seam binding in half lengthwise and ran a gathering stitch down the center. I found that working with four to five yard pieces was manageable and created enough ruched trim for a single motif. The ruched trim was then pinned onto the lace motif and sewn on with the lingerie thread. The embellished motifs were then applied around the midsection of the overdress. To create the illusion of lace 'floating across' my daughter's back, two large motifs were applied diagonally across her back. Since the tulle dress was not darted or shaped in any way, the appliques were used to create the shaping necessary to give the overdress a close fit.
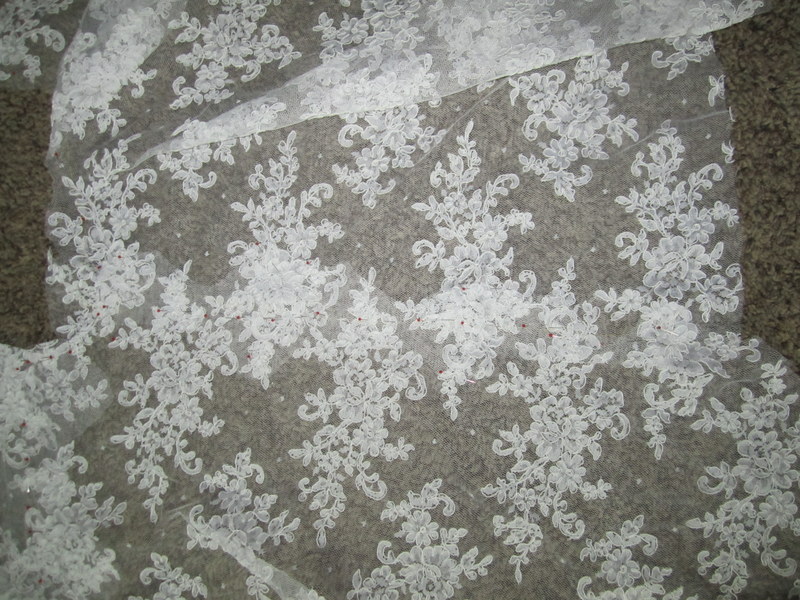
The tulle overdress laying flat...
Inside the left side of the corselette, I appliqued a small heart cut from my husband's jeans. This was the 'something blue' worked into the gown. A piece of my wedding gown was used to embroider a label and was the 'something old' worked into the gown.


